Showing posts with label Aud Design. Show all posts

Tuesday, 2 December 2008

Altered Board Book- 'E'


I went to a Scrapaholix roadshow a couple of weeks ago, and was completely uninspired as to what to do. I haven't scrapped for ages, and couldn't get into the right mindset to organise myself. So I took along my altered board book and did another page.

Colour: Paint Dabber, Moonshadow mist, Versamagic
Stamp: Aud Design (in white on the green, very subtle!)
Papers: Crate Paper, Basic Grey
Other: Gin-X rub on letters, Dovecraft heart, black pen

Wednesday, 5 December 2007

Petra's CJ.


This is my first ever entry in someone else's journal! If you recall, I am in a circle journal with 9 other people from UK Stampers, and the idea is that we send a journal around with an unmounted stamp, and everyone does an entry with that stamp. Well, this is Petra's journal, and she has chosen a journal made of envelopes and tags. Each player decorates an envelope, then uses Petra's stamp on the tag. Petra's stamp is a sort of hippy-chick from Time to Stamp, quite a challenging one really! First of all, it made me think of 'Hair', then I started to think about 'Lucy in the Sky with Diamonds' by the Beatles. Hence the colours etc! (Check out the 3rd photo for the lyrics if you need an explanation).
The envelope is covered in paper made using the usual water/craft mat/Distress Ink technique. The diamond stamps are by Limited Edition, and the swirl stamp is from Paperartsy. The 'tangerine tree' is done using stamps from Aud Design, and the 'cellophane flowers' are also Aud Design. They are yellow and green, coloured with alcohol inks, but didn't photograph well.
The tag inside was inspired by those star charts, which show the night sky as a join-the-dots picture to explain the constellations. After sponging on some distress inks, I used Field of Sky to stamp on my stars in silver, then used Petra's stamp with Versamark and clear holographic embossing powder. As you can see from the photo, when you tilt the tag the image of the woman becomes clear, tilt it back and she's invisible!
I'm up to my eyeballs in birthday cards again, I have three to do this week. Then I have a flurry in January, and that's it for a while! I think that in February I need to sit down and make a few, so I'm not always playing catch-up. But I did take the time to make some arty ATCs for UK Stampers. I got really inky and pricked my fingertips (I used hand-sewing on them!), but afterwards I felt really good. Sometimes you just need to go where your muse takes you, it's really therapeutic. I forgot to take photos, though, sorry!
Thursday, 29 November 2007

Cards for Babies.


Has it really been three weeks since I last checked in? As you can see, I have been busy. As well as making all of the cards, I have been to lots of baby parties, and held our own for my little one year old. Happy birthday to them all! The last of the parties was today, and although they were fun they were also exhausting! Babies, cake and toys equal noise and grizzly little ones after a couple of hours. And I'm sure it only gets worse as they get older!
As you can see from the photos, I have a couple of new toys. First of all, I have some new stamps, the fairy is from Wendie Rhodes and the boy with the balloon is Magnolia (the other two Magnolia stamps were kindly sent to me by Kym, thanks so much, Kym!). Then my lovely husband bought me a Cuttlebug for Christmas, and said I could have it now, bless him! Other than those, I have used H20s for all of the colouring in, and stamps from Stampendous, Aud Design and Forth Dimension. There's also a little Glossy Accents, Brilliance and Sakura glaze pens thrown in for good measure.
I found it interesting doing these cards. The colouring in was really good fun, but the designs were hard to do! I think grunge is much more my usual style, but I will have to get good at these cutie things too! Wish me luck!
PS I owe a couple of Ladies a RAK over on 2Peas. I haven't forgotten, just didn't make the time to organise it! Will sort this weekend.

Monday, 17 September 2007

Mission Collage: Part Three

These are the next three steps of Mission Collage:

1. Smudge: Wet your fingers and smudge any of the chalk, pastel, crayon, charcoal on your project.

2. Magazine: Attach a page or piece of a page of magazine to your collage and then use a damp cloth or baby wipe to remove areas of ink from the magazine you put on your collage. Cheap magazine pages work the best. Scrub a dub dub!

3. Stamp: Anywhere, anykind, any amount. Caution: be careful about what kind of ink you choose to stamp with...there may be wet areas again on the project before we're finished!

Mmmm. I have got an idea of where I'm going with this, but I will confess that I'm really not sure about the magazine page! I chose to use a page from the Waitrose magazine as it had a list which looked quite interesting, but when I attached it the writing was a bit intrusive (it was food related stuff) so I rubbed it off. Of course, I had used gel medium to attach the page, so you can see the reversed text from the other side of the page, which I quite like! But then I used some Distress Ink to take the colour down from the pure white, and it really absorbed into the paper in some places, but not evenly. Luckily there are more steps to do, so I will make it better! The stamps are from Aud Design.
More tomorrow, it will be the penultimate stage!

Monday, 3 September 2007

Do not adjust your set...


I have made a cute card! I know this is not my usual thing, but a soon-to-be five year old girl would not really appreciate alcohol inks and image transfers (yet!). It's a waterfall card, and for anyone who hasn't come across one of these before, Splitcoast Stampers has the best instructions that I have found.
The base card is a plain white DL size card, stamped with Aud Design flowers and Brilliance Pearlescent Orchid ink. The squares are also white card, covered with paper from Karen Foster Design, with fun foam die-cut letters (cut in my Sizzix Sidekick, it works fine!) The band across the front is fun foam, held on with brads, and the strap which is the mechanism is covered with Karen Foster paper, and stamped with my MSE clear alphabet. I haven't taken a half-open photo, but as you pull the fun foam flower, the letters flip to spell 'Tyler'.
I took a photo of the inside of the card too. With all of my cards, I like to add a computer generated insert, and recently I have started stamping inside as well. I think it adds a nice finishing touch. And I do the envelope, does it sound like I just can't stop! This card is in the post now, so I did stop...eventually!

Sunday, 29 July 2007

New header.

As you can see, I have finally got around to making a few little changes on here, just little tweaks to make it a bit nicer. This is partly thanks to Godelieve, as she has a blog devoted to helping us novices with improving on the original template.
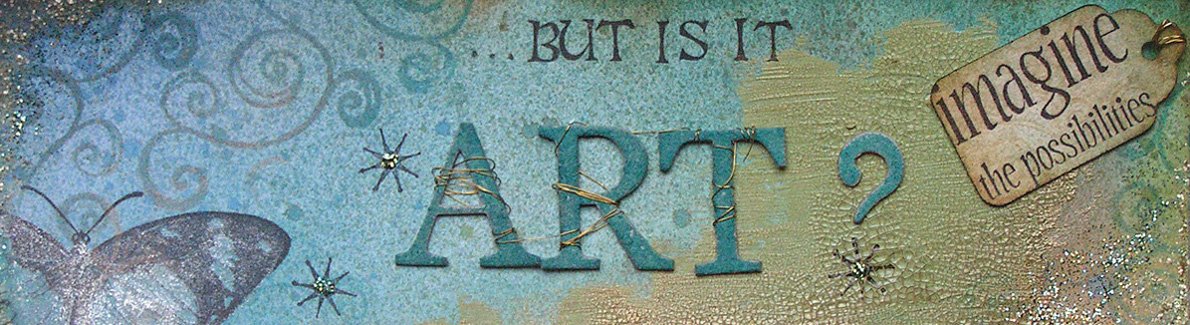
I've been planning this header for ages, I have just been so busy with other projects that I kept putting off making it. I wanted to use all of my favourite stamps and techniques, to reflect the general content here. So, stamp-wise, you will see my Cherry Pie and Aud Design swirls, Hero Arts script, PSX alphabet, Cherry Pie face and a butterfly stamp (Rubbadubadoo). The background was made using the craft mat/water technique and Distress Ink in Dusty Concord plus Nick Bantock Dye Ink in Damson Plum. All of the black stamping was done using Versafine, and the golds were either Perfect Pearls on Versamark or Gold heat embossing on acetate. The chipboard letters are from Making Memories and were coloured with Brilliance Inks, the gold swirl is 7Gypsies, and the flower is Prima.
Oh, and if anyone is interested, the name of this blog is from an ATC I did for one of Isa's challenges, which said "I like it...but is it Art?" It refers to the interesting question for stampers, that since we are using someone else's images, is it art? Or maybe it should be "Whose art is it anyway?"

Saturday, 28 July 2007

Think Monday, Think ATC- Holiday

I finally managed to finish my ATC for this week's Think Monday, Think ATC challenge. Boy, did I struggle with this one! I hope it's just because of this cold I have, but I really wasn't inspired, and this isn't my best work. However, I have decided to use it, even though I don't like it, as I am not ashamed to show I have off days! The important thing is to recognise when something isn't quite right. It would be far worse if I thought this was amazing!
Anyway, the faux postcard in the background was made with my Hero Arts script stamp, a Rubbadubadoo butterfly stamp, and Distress Ink in Vintage photo. Then there is a layer of torn Mulberry paper, then a photo of a French beach printed onto a transparency. Finally, a swirl stamp from Aud Design was stamped in black Stazon and highlighted with white pen, and I wrote "Wish you were here" to finish. Hmmm, not sure where I was going with this!

Thursday, 5 July 2007

Finally I can show the photos!


Kym has now received this so I can stop teasing and show the finished book! This is my contribution to UK Stampers Velvet-ize swap. It's a bit hard to work out how this book works, until you follow the instructions and make it. It is a 6" square book when closed, but it has two front covers which sit one on top of the other, so that when they are open the book is 18" wide. The inside pages also fold on top of each other, and have fold out flaps, whew, it does sound complicated! Luckily the instructions from Craft TV Weekly are excellent, so it was pretty easy to put together.
The details of how I made the background paper are on a previous post here, and the instructions for the book are here at Craft TV Weekly (you will need to join to download the PDF, but it's free). To embellish, I firstly used a sponge and Distress Ink in Dusty Concord to add colour around the edges of the covers, inside and outside. I made tags and a pocket for them inside the covers, and printed off the quotation on vellum, which is inside the chipboard frame. The flowers are also sponged with Dusty Concord Distress Ink. The paper on the back of the inside pages is from K and Co, sponged again. There are several slide mounts, coloured and stamped to match, then the rest of the embellishments are from Dovecraft (chipboard), Prima (flowers) and Making memories (all of the metal items). All of the ribbon is from my stash.The spaces are for Kym to add photos or vintage images, whatever she likes really!
I loved making this book, although it was a little nerve-wracking to make for someone else, especially someone whose work I really like! I am now planning to make one for my Husband as a delayed birthday present, and fill it with photos of him with the baby. I will show it when it's done!

Friday, 29 June 2007

Thank you, Brayergirl! Great class!


I went back into 2 Peas' World Stamping Weekend's list of classes to start to catch up on what I missed last weekend, and as mentioned in a previous post, I did Kristy's background class. The first photo today is of the resulting creation. Kristy's class has all of the details, but to cut a long story short, you start with the 'faux batik' technique to create some white areas, add your colourwash, which I did using the craft mat/Distress Inks technique, then use a couple of complimentary colours and stamps to create your printed background. What fun! I needed to make two large pieces of paper, English size A2, so I worked on my biggest craft mat, and with some fairly large stamps. My final touch was to add a spritz of perfect pearls mixed with water, in a spray bottle, which Isa and Julie both talk about on their blogs; it adds a beautiful, subtle shimmer. Stamps used are Hero Arts and Aud Design, inks are Distress Inks in Weathered Wood, Milled Lavender, Antique Linen and Tattered Rose. (Again!)
The second two photos are of the mini-book I have made with the background paper. It is for the UK Stamper's Vevet-ize swap. I am not going to post it until Saturday, because of the postal strike today, and I'm not going to show photos of the whole book until it has been received! I want it to be a bit of a surprise for Kym. I hope she likes it! I am due to receive a book from Sid, which I am really pleased about as I love his work. In fact, I would have been happy to receive a book from anyone on the list, they are a talented bunch! All of the photos will go onto the UK Stampers cyberblog, I will post the link when they are ready to be viewed.
I won't be stamping this evening, as my Husband is back from a second week away from home, and I have a surprise planned for him. It's a secret and I've managed to keep it from him for three weeks! Shhh!

Tuesday, 26 June 2007

'Buttons and Bows' ATCs


I had a really productive evening yesterday. I finished my ATCs for the UK Stamper's June swap, I made a background paper (Another one!) using the instructions from Kristy's 2nd class at 2 Peas Worldwide Stamping Weekend, and then I made the paper into a mini-book for another UK Stampers swap. I will confess, I was really tired but decided not to go to bed until the baby woke up, and then at ten past midnight, I realised that he hadn't woken up and it really was bedtime! But I felt so pleased at what I had achieved, and at how much fun I had had.
The photos are (obviously) of the ATCs. I'm too embarrassed to confess where the song lyrics are from, although if anyone recognises them, feel free to comment, I will publish the truth! The background is an image of a French postage stamp which shows the revolutionary fashion movement, 'Les Incroyables', and I pasted the image several times using Mod Podge. I then painted gesso over the top, and scraped off the excess using an old credit card. The bow image was made using a swirl from Aud Design and a bow from Fourth Dimension, and stamped in the Nick Bantock ink I bought recently. The lyrics were printed on acetate, then adhered using a Queen and co brad. The buttons and ribbon were from my stash.
Worldwide Stamping Weekend was a great success at 2 Peas, the submissions in the gallery ran to 26 pages. The threads for the classes are still there, and I intend to go back and do some just for fun, since I missed the main event. There is talk of another day for later in the year, watch this space for details, or even better, go and join up!

Monday, 25 June 2007

The Long Weekend.


This weekend my brother got married, so congratulations to Mike and Mandy. The weather was awful, apart from a little patch of sun for about half an hour, just when the photos were being taken! I only got a couple of photos, which isn't like me, as I usually take hundreds! The baby was very, very excited, though, and this time I couldn't manage him and the camera. He's still excited now, hence the title; it's a very long weekend if he doesn't sleep!
I had made my brother a little present a while back. This is Craft TV Weekly's 'Accordian book in a box', which a few of us over at UK Stamper's made. It involves origami-type folding, for the box as well as the pages of the book, and I was a little intimidated to begin with, as I don't consider myself dexterous enough for fiddly techniques (or should that be patient enough!). This project came together easily, though, and I will make more as it uses 6" square papers, which I have a bit of a stash of from when I started scrapping, and thought I would never be able to do a 12" page!
The papers are K and co, the flowers Prima, and the buttons were donated by my Husband from his collection of spares. The stamps used were Papermania foam word stamps and Aud Design, and were stamped in Ancient Page Sandlewood and Whispers Chestnut, both of which are beautifully transluscent. Any other embellishments came from my stash.
I didn't stamp yesterday, as I was so tired, and not feeling inspired, but I've woken up with some ideas, so will put up something new tomorrow!

Thursday, 7 June 2007

Black and white inchies.

Anyone involved in this swap, look away now! These are for a swap on UK Stampers with the theme of 'black and white'. I made the background as one piece, then cut it into the individual 2.5cm square pieces. When it was done, it made me think about the illustrations in fairy stories, I'm not quite sure why! Hence the fairy-tale inspired words, and the theme of the embellishments. I suppose inspiration comes from very individual memories and emotions, you just hope someone else will understand where you're coming from. Or at least like the results, yes, I'll settle for that!
Background stamps from Hero Arts, Tandastamps, and Aud design. Words printed from the computer. Now I just have to wait to receive my swaps!

Wednesday, 6 June 2007

Shrink plastic embellishments


I didn't do an awful lot last night, I mainly tidied up after my mad tag-making session of the night before. I am obsessively organised with my craft storage, but when I get crafting, I think I get out practically everything I own and leave it in my working space of 1m x 0.5m! But then I do have the satisfaction of putting it all back in the right place and in the correct order. I also finished cutting out my unmounted stamp sheets and putting them away (in order, of course) in CD cases. I had just cut out the ones I wanted to use, so I am now up to date and organised.
What I did do last night was make some little embellishments to go on my black and white inchies. Practically all of my embellishments are coloured or at least metallic, and I thought I would be a purist here and only use black and white. So out came the shrink plastic again, and I stamped a variety of images in black Stazon on the white, and Brilliance Moonlight white on the black. Stamps used are from: Tandastamps, Anna Griffin, Aud design, Cherry Pie, Stampendous. I think that's all of them!

Monday, 4 June 2007

Paris mini (name badge) album


This is what I was working on last night, the Name badge album challenge from UK Stampers. Basically, it is a really small mini album, 8.5cm wide by 5.5cm deep, using security badges from a stationers as page protectors. The original, from Craft TV Weekly, used slightly bigger pockets, but this was all I could find on the high street. I have chosen the theme of my favourite places in Paris, and I'm using photos from my visit in 2004, for my tenth wedding anniversary.
As you can see, the first pair of pages is of Notre Dame de Paris. Our hotel was in the Quartier Latin, and each morning we took our croissants, crossed over the river Seine, and ate them in front of the cathedral. Lovely memories!
Enough of the reminiscences! The background papers were made using an 'aged newsprint' effect in Paint shop pro, then stamped with a script stamp from Hero Arts, and swirls by Aud Design. The brads are all Making Memories. I haven't scrapped for ages, as you see my style is 'cluttered' as I love embellishing!

I have used some of my lovely caught in crystal background, but I know that trying to photograph acetate in artificial light just doesn't work, so I will post the photos tomorrow!

Thursday, 31 May 2007

Isa's weekly challenge- 'B'

This is my entry for this week. The main image is by Paperartsy, with my favourite Aud Design swirls in the background, all stamped in Black Stazon. I used my distress inks as watercolours on the background, colours used are Weathered wood, Milled lavender, Dusty concord and Scattered straw. The alphabet is PSX. See Isa's blog for details.

More photos of the 'Mona' ATCs


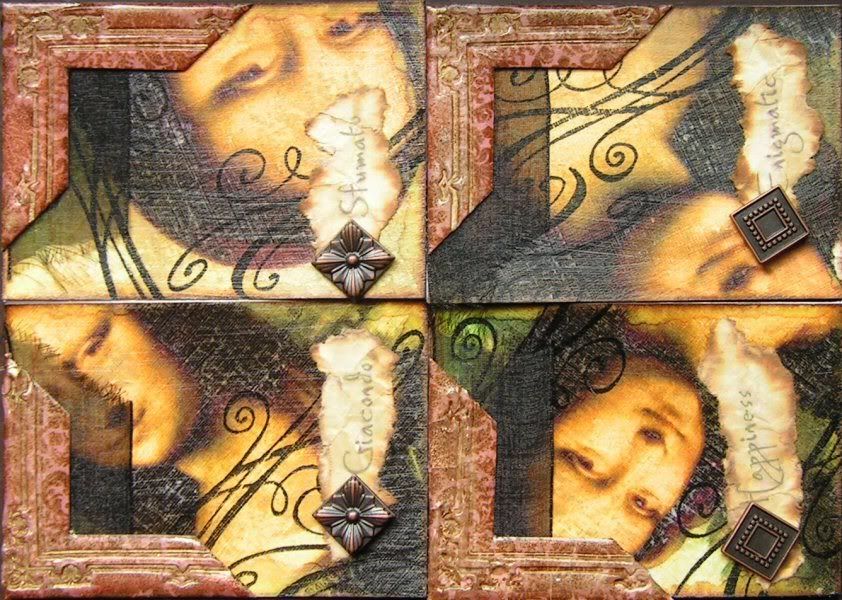
Here is a better view of the ATCs, and they are the right way up! I forgot to say that I made 4, so I could keep one for myself.

UK Stamper's May ATC swap

While I was waiting to organise some new photos and add some slideshows, I remembered these ATC's which is for the May 3 x 3 swap on UK Stampers. These are the first ATCs I have made, and I think I am addicted. I have since made 2 more, photos to come. The theme was Mona Lisa (you'd never have guessed!) and I got a little technique happy here. The initial image was printed onto textured cardstock, sanded, then rubbed with distress inks and spritzed with a little water. Then I stamped in black Stazon using Aud Design stamps and coated with Glossy Accents. The words were printed from the computer, then rubbed with Distress Inks again. The corners were card, stamped with an Anna Griffin damask image, then triple embossed and stamped with a frame stamp from the same set. Lastly I added a piece of organza ribbon, to reflect the veil the Mona Lisa is wearing, and some Making Memories brads.
Thanks for looking.